Advanced Wound Task Trainers Instructions
Disclaimer: these instructions will reference the silicone product Dragon Skin™, the silicone thickener product Thivex™, the mould-making product Smooth Cast 300™ and the pigment product Silc Pig™. This is not an endorsement or sponsorship of these products. Individuals are invited to use alternative like-products for their proto-types. Instructions below are specific to the commercial products described. Individuals who use like-products as substitutes should follow the package instructions.
Reviewer Notes: If making multiple wound molds at once try making the silicone at the same time. If you have extra from making one mold you can use it and add the other components (e.g. pigment, silicone thickener,etc. afterwards). This could save on cost and time depending on your learning needs.
Simulated Burns
Revised: January 2024
Time Commitment: 45 to 60 minutes
Creators: Sébastien Perth Reviewers: Jacob Vanderploeg
Content warning: gore
What you will need
- Special Effects Grade Silicone (Dragon Skin™ FX pro Part A & B used for trainer below)
- Disposable measuring cups (e.g. graduated medicine cups)
- Disposable larger cup (e.g. disposable drinking cup)
- Disposable stir sticks (e.g., coffee sticks, popsicle sticks, or tongue depressors) (to mix and shape silicone)
- Silc pig™ flesh tone, black, and red (optional pigment system compatible with Dragon Skin™)
- Silicone thickener (Thivex™ was used for trainer below)
- Manikin arm or rounded shape for burn surface (thick plastic jar like peanut butter) (make sure to stabilize item using disposable clothes or plastic items that can be washed)
- Personal protective equipment: gloves and eye protection
- Knife or scalpel to clean up frayed/uneven edges
- Optional: alcohol-based makeup to amplify burned look, example here
- Optional: fake soot to amplify burnt appearance, example here
- Optional: fake blood to amplify burnt appearance, examples here
Instructions
| Assembly Instructions | Pictures |
|---|---|
| Step 1: Determine silicone amounts Determine the length and depth of the burn to calculate below: 16 ml of silicone (8 ml each of parts A and B) will make 1in3 volume (16mL/in3). E.g., To make a 0.75” thick layer in a 3x5” mould, you will require 180 mL of silicone (90ml each of parts A and B). 3/4” x 3” x 5” = 11.25in3. 11.25in3 x 16mL/in3 = 180 mL | |
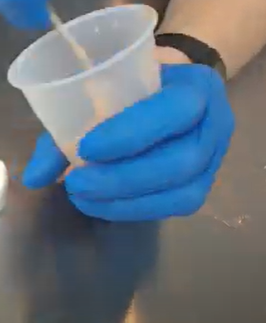
| Step 2: Prepare the silicone Open and pour the calculated amount of Dragon Skin™ FX Pro Part A into a small measuring cup. Stir Part A. Open, pour, and stir (with a different stirring tool) equal parts Part B into a separate small measuring cup. Once measured, Dragon Skin Part B can be poured into a disposable cup large enough to hold the final amount (e.g., for 3x5” mould, 180ml). |  |
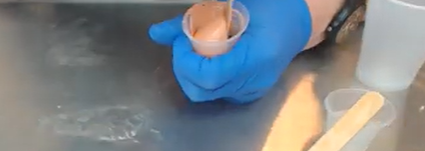
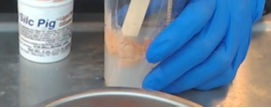
| Step 3: Add pigment If using, add red-brown tone Silc pig™ pigment(s) to Part B using a disposable toothpick or stir stick, and stir vigorously for 15 seconds/until completely combined without streaks to give a bloody colour. TIP: A little goes a long way. Start with a small amount of pigment; if you need more, add it, and stir again before adding Part A. | 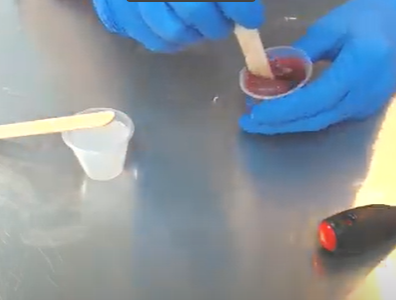 |
| Step 4: Mix silicone together Add Part A to Part B and mix vigorously for 15 seconds / until completely combined without streaks. IMPORTANT: Now that A&B are combined, you must pour it within 12 minutes, or it will begin to set / not pour. | 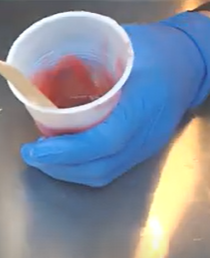 |
| Step 5: Add Thivex™ Start by adding a few drops of Thivex™ or other silicone thickener. Aim for a thickness that will hold to the side of the cup for several seconds. The goal is that it does not run down the rounded surface when poured. Add more drops as needed and mix thoroughly. | 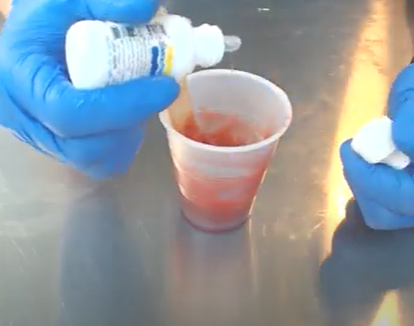 |
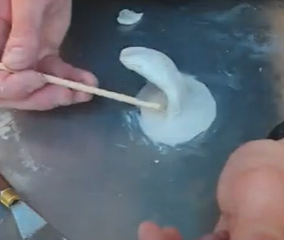
| Step 6: Apply silicone to smooth surface Slowly pour silicone on to rounded surface and spread using tongue depressor. Dab lightly for a few seconds while it sets to create textured effect on silicone. NOTE: If applying simulated burn to arms or legs pour silicone onto secure rounded surface. |  |
| Step 7: Remove silicone After approximately 30-40 minutes of curing, remove silicone from the surface. This wound can now be placed on manikins or standardized patients for repeated use. |  |
| Step 8: Amplify your look OPTIONAL: to amplify your look, add fake soot, fake blood, and additional redness with alcohol-based make-up to the SP or manikin to create a realistic burnt look. | 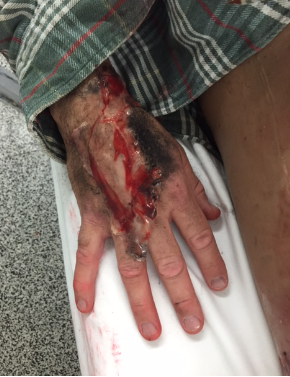 |
Simulated Purulent Wound
Revised: January 2024
Time Commitment: 60 to 90 minutes
Creators: Sébastien Perth Reviewers: Jacob Vanderploeg
Content warning: gore/pus
What you will need
For assembly
- Special Effects Grade Silicone (Dragon Skin™ FX pro Part A & B used for trainer below)
- Casting Product (Smooth Cast 300™ Part A & B was used for the trainer below)
- Clay for walls and to texture skin surface
- Tools to shape clay (toothpicks, stir sticks, etc.) (wood tools work best)
- Disposable measuring cups (e.g. graduated medicine cups)
- Disposable larger cup (e.g. disposable drinking cup)
- Disposable stir sticks (e.g., coffee sticks, popsicle sticks, or tongue depressors)
- Silc pig™ flesh tone (optional pigment system compatible with Dragon Skin™)
- Personal protective equipment: gloves and eye protection
- Knife or scalpel to clean up frayed/uneven edges
- Small piece of plastic (cut syringe plunger, mascara stem, plugged needle cap (can plug with clay), etc.)
- Wax paper to line your container or surface to make it easier to remove clay skin if using.
- Optional: rolling pin
- Optional: baby powder
- Optional: tooth brush
- Optional: Power mesh (to add layer that sutures can ‘bite’ into)
For adding purulent drainage
- Non-dissolvable suture
- Petroleum jelly
- Yellow food colouring
- 20cc syringe with blunt tip needle
- Optional: alcohol-based make-up to add infected look. Example here
Instructions
| Assembly Instructions | Pictures |
|---|---|
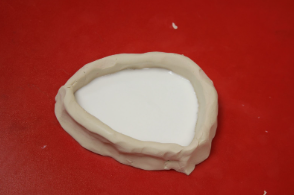
| Step 1: Prepare the wound surface Line your flat surface with wax paper. Examples of a suitable flat surface would be a kitchen counter, stainless steel surface, etc. Alternatively, use a large flat-bottomed container as your work surface with wax paper (e.g. cookie sheet). TIP: The Smooth Cast™ creates heat, so ensuring wax paper with a sturdy surface will potentially minimize any damage to your work surface. On a flat surface, form clay that is slightly raised approximately 0.4-0.6”, the raised portion will represent your wound. Try to make the transition from clay to work surface smooth, so the end product appears more natural on skin or on a mannequin. TIP: Keep in mind that the clay design will be what the finished silicone looks like. Take time to clean it up if needed. TIP: Dipping a finger in water and then rubbing it on the clay can give it a smoother texture. Just be careful not to use too much water. | 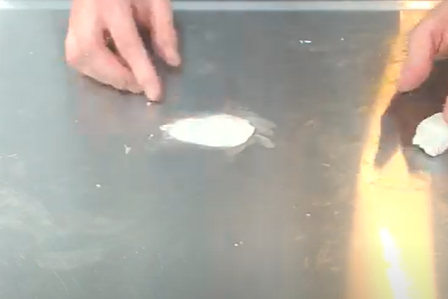 |
| Step 2: Prepare the clay walls On a flat surface, roll clay into long strips about 1.5-2” wide, and ¼” thick. The length of your pieces will be dependent on the size of your wound. Make a wall around the wound, leaving at least 1cm between the wound and the wall. Make sure no gaps appear that could let the Smooth Cast™ seep out. TIP: You can roll out the clay using the Smooth Cast™ bottles (securely sealed) or a rolling pin. |  |
| Step 3: Determine Smooth Cast™ amount To make a 0.75” thick layer in a 3x5” mould, you will require 180 mL of Smooth Cast™ (90ml each of parts A and B). 3/4” x 3” x 5” = 11.25in3. 11.25in3 x 16mL/in3 = 180 mL | |
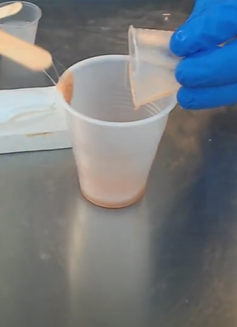
| Step 4: Pour the mould Step 4A: Open and stir Smooth Cast™ Part A into a small measuring cup. With a different stirring tool, do the same for equal parts Part B into a separate small measuring cup. You need enough to completely cover the clay wound by at least a few millimetres. Step 4B: Combine Parts A & B in a large cup and pour into clay walls. Ensure there are no leaks, and cover any existing leaks with more clay. Wait 10-15 minutes to let the Smooth Cast™ cure. It will become warm to the touch and opaque. | 4A 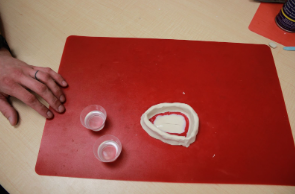 4B |
| Step 5: Cleaning the mould Once the Smooth Cast™ has hardened, you can peel away the clay which can also be reused. TIP: You may notice some thin pieces of Smooth Cast™ in the clay. You can take these pieces out if you plan on reusing the clay. The mould may have sharp edges or flashing (thin pieces of plastic). If so, use an exacto knife or scalpel to trim away any excess Smooth Cast™. TIP: Using a toothbrush to scrub with warm water can help remove clay that may still be stuck to the mould. | 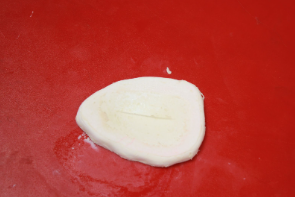 |
| Step 6: Making the cavity Add a small piece of plastic into the cavity of the cured mold. This should be a solid piece of plastic. (Can also use a clay log if no sufficient material exists). Stick the plastic piece to the mold using a bit of clay. This will later be removed to create the cavity to add the drainage into. | 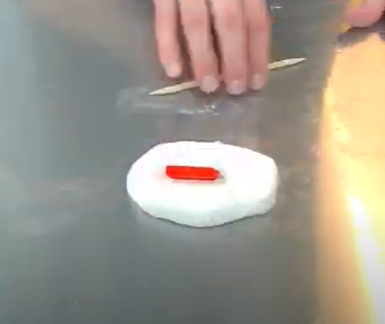 |
| Step 7: Determine silicone amount If you decided to use a different size mould (i.e., not 3x5”) you need to determine how much silicone you need to fill your mould. 16 ml of silicone (8 ml each of parts A and B) will make 1in3 volume (16mL/in3). E.g., To make a 0.75” thick layer in a 3x5” mould, you will require 180 mL of silicone (90ml each of parts A and B). 3/4” x 3” x 5” = 11.25in3. 11.25in3 x 16mL/in3 = 180 mL | |
| Step 8: Prepare the surface layer of silicone Step 8A : Open and stir Dragon Skin™ Part A in a small disposable measuring cup. With a different stirring tool, do the same for Part B in a different measuring cup. Step 8B : Once measured, Dragon Skin™ Part B can be poured into a disposable cup large enough to hold the final amount. Step 8C : Add flesh tone pigment(s) to Part B using a disposable toothpick or stir stick, and stir vigorously for 15 seconds/until completely combined without streaks. TIP: A little goes a long way. Start with a small amount of pigment; if you need more, add it, and stir again before adding Part A. Step 8D : Add Part A to Part B and mix vigorously for 15 seconds / until completely combined without streaks. IMPORTANT : Now that A & B are combined, you must pour it within 12 minutes, or it will begin to set. | 8A:  8C: 8D: |
| Step 9: Pour the silicone Pour the prepared silicone with the skin tone pigment of your choice into the mold. Note: the plastic piece should be covered by at least a couple millimeters of silicone. If you notice leaks, plug them with additional clay or tape. Do not over pour and cause an overflow of the silicone. OPTIONAL Reviewer note : If planning to use the task trainer multiple times, it may be beneficial to pour halfway, add a Power mesh layer, as in Step 7 of the Suture and Staple pad task trainer. This will give the sutures something to ‘bite’ into during Step 13. Wait 40 mins (for a 3” x 5” wound) to cure. For other sizes, follow package instructions on wait time. | 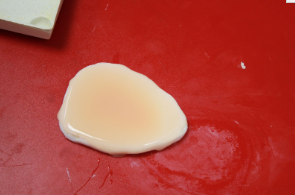 |
| Step 10: Remove silicone task trainer from mould Once removed from mould, touch up any frayed edges with scissors if desired. TIP: Baby powder can be used to remove the silicone task trainer to make it less sticky and easy to remove. | 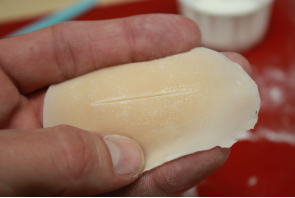 |
| Step 11: Remove plastic piece Carefully remove the plastic piece from the mould, revealing the cavity that was inside. TIP: If having difficulty removing plastic piece, use scalpel to lengthen incision. | 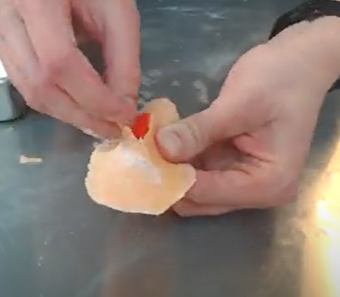 |
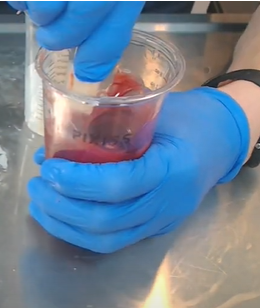
| Step 12: Mix purulent drainage Mix petroleum jelly with yellow food coloring in a small cup. Take a syringe (50cc catheter tip, or 10cc or 20cc Luer Lock work well), and remove the plunger. Then, using a tongue depressor, scoop the petroleum jelly into the syringe. Replace the plunger and push contents to the end. For the Luer Lock syringe, add a blunt tip needle. | 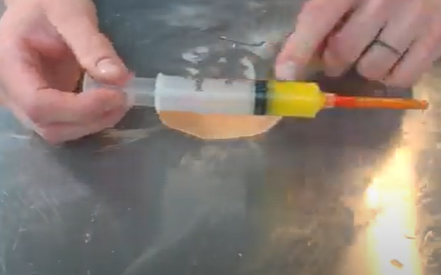 |
| Step 13: Stitch incision and apply make-up Add stitches to the incision using any suture technique you prefer to partially close wound. OPTIONAL: Add alcohol activated make-up to make the top of the wound look infected | 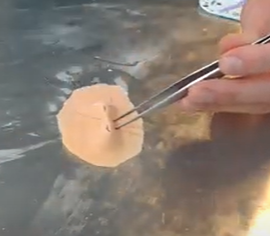
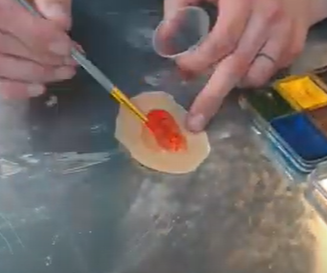 |
| Step 14: Insert drainage into wound Insert the syringe (with or without blunt tip cannula) into the stitched cavity to insert the pus-like substance. Push slowly to reduce pressure build-up. | 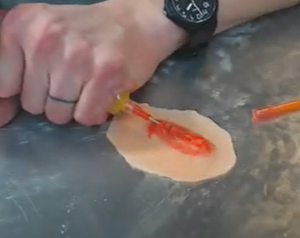 |


Simulated Bleeding Wound
Revised: January 2024
Time Commitment: 60 to 90 minutes
Creator: Sébastien Perth
Content warning: simulated blood
What you will need
For assembly
- Special Effects Grade Silicone (Dragon Skin™ FX pro Part A & B used for trainer below)
- Casting material (Smooth Cast 300™ Part A & B used for trainer below)
- Clay for walls and to texture skin surface
- Tools to shape clay (toothpicks, stir sticks, etc.) (wood tools work best)
- Disposable measuring cups (e.g. graduated medicine cups)
- Disposable larger cup (e.g. disposable drinking cup)
- Disposable stir sticks (e.g., coffee sticks, popsicle sticks, or tongue depressors)
- Silc pig™ flesh tone (optional pigment system compatible with Dragon Skin™)
- Personal protective equipment: gloves and eye protection
- Knife or scalpel to clean up frayed/uneven edges
- Scissors
- IV tubing
- IV extension set
- Red food colouring
- Fake blood or water with red food colouring
- Wax paper to line your container or surface to make it easier to remove clay skin if using.
- Optional: rolling pin
- Optional: baby powder
- Optional: tooth brush
Instructions
| Assembly Instructions | Pictures |
|---|---|
| Step 1: Prepare the bleeding wound surface Line your flat surface with wax paper. Examples of a suitable flat surface would be a kitchen counter, stainless steel surface, etc. Alternatively, use a large flat-bottomed container as your work surface with wax paper (e.g. cookie sheet). TIP: The Smooth Cast™ creates heat, so ensuring wax paper with a sturdy surface will minimize the potential of any damage to your work surface. Cut a piece of IV tubing a few inches longer than the anticipated length of your wound. On a flat surface, form clay around IV tubing. Allow 0.2” thickness above tubing and secure base around tubing. TIP: Try to make the transition from clay to work surface smooth, so the end product appears more natural on skin or on a mannequin. Dipping a finger in water and then rubbing it on the clay can give it a smoother texture. Just be careful not to use too much water. | 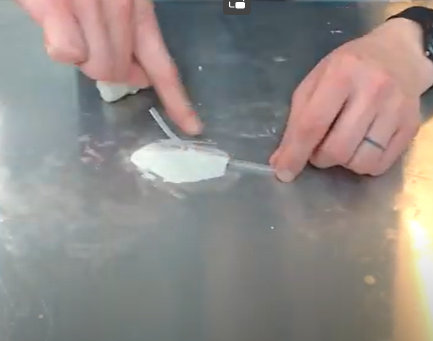 |
| Step 2: Remove tubing Once satisfied with structure, carefully wiggle out tubing from the clay, so as not to disturb the clay cavity formed. | 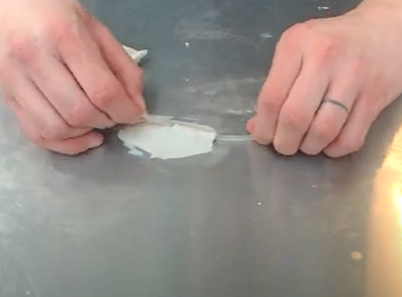 |
| Step 3: Complete your textured look With clay shaping tools, add details such as incision line, suture scarring, etc. Keep in mind that the clay design will be what the finished silicone looks like. Take time to clean it up if needed. TIP: Dipping a finger in water and then rubbing it on the clay can give it a smoother texture. Just be careful not to use too much water. | 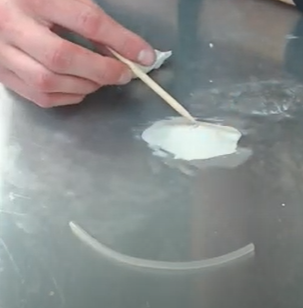 |
| Step 4: Prepare the clay walls On a flat surface, roll clay into long strips about 1.5-2” wide, and ¼” thick. The length of your pieces will be dependent on the size of your wound. Make a wall around the wound, leaving at least 1cm between the wound and the wall. Make sure no gaps appear that could let the Smooth Cast™ seep out. TIP: You can roll out the clay using the Smooth Cast™ bottles (securely sealed) or a rolling pin. |  |
| Step 5: Determine Smooth Cast™ amount To make a 0.75” thick layer in a 3x5” mould, you will require 180 mL of Smooth Cast™ (90ml each of parts A and B). 3/4” x 3” x 5” = 11.25in3. 11.25in3 x 16mL/in3 = 180 mL | |
| Step 6: Pour the mould Step 6A: Open and stir Smooth Cast™ Part A in a small measuring cup. With a different stirring tool, do the same for equal parts Part B in a different cup. You need enough to completely cover the clay wound by at least a few millimetres. Step 6B: Combine Parts A & B in a large cup and pour into clay walls. Ensure there are no leaks, and cover any existing leaks with more clay. Wait 10-15 minutes to let the Smooth Cast™ cure. It will become warm to the touch and opaque. | 6A 6B |
| Step 7: Cleaning the mould Once the Smooth Cast™ has hardened, you can peel away the clay which can also be reused. TIP: You may notice some thin pieces of Smooth Cast™ in the clay. You can take these pieces out if you plan on reusing the clay. The mould may have sharp edges or flashing (thin pieces of plastic). If so, use an exacto knife or scalpel to trim away any excess Smooth Cast™. TIP: Using a toothbrush to scrub with warm water can help remove clay that may still be stuck to the mould. | |
| Step 8: Remove cavity clay Carefully remove clay from between the IV channel and the mould itself. (No clay should remain). TIP: A toothbrush and warm water can also get rid of excess clay. | 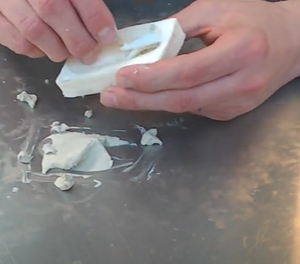 |
| Step 9: Create small gap in mould Once the clay is all removed, using sharp snips or scissors, create a small gap in the tubing channel nearest the top of the mould (see video). This allows the silicone to form around it and for you to securely remove the silicone after curing | 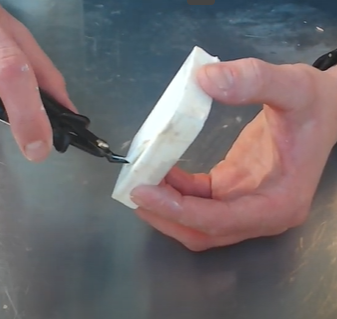 |
| Step 10: Determine silicone amount If you decided to use a different size mould (i.e., not 3x5”) you need to determine how much silicone you need to fill your mould. 16 ml of silicone (8 ml each of parts A and B) will make 1in3 volume (16mL/in3). E.g., To make a 0.75” thick layer in a 3x5” mould, you will require 180 mL of silicone (90ml each of parts A and B). 3/4” x 3” x 5” = 11.25in3 11.25in3 x 16mL/in3 = 180 mL | |
| Step 11: Prepare the surface layer of silicone Step 11A : Open and stir Dragon Skin™ Part A in a small disposable measuring cup. With a different stirring tool, do the same for Part B in a different measuring cup. Step 11B : Once measured, Dragon Skin™ Part B can be poured into a disposable cup large enough to hold the final amount. Step 11C : Add flesh tone pigment(s) to Part B using a disposable toothpick or stir stick, and stir vigorously for 15 seconds/until completely combined without streaks. TIP: A little goes a long way. Start with a small amount of pigment; if you need more, add it, and stir again before adding Part A. Step 11D : Add Part A to Part B and mix vigorously for 15 seconds / until completely combined without streaks. IMPORTANT : Now that A & B are combined, you must pour it within 12 minutes, or it will begin to set. | 11A: 11C: 11D: |
| Step 12: Pour the silicone Pour the prepared silicone with the skin tone pigment of your choice into the mould, making sure to cover the IV tubing channel by at least a couple millimeters. Be sure to not overpour silicone. Wait 40 mins (for a 3” x 5” wound) to cure. For other sizes, follow package instructions on wait time. | 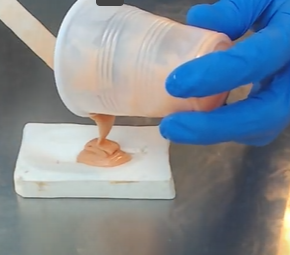 |
| Step 13: Remove the appliance Carefully remove the edges of the silicone mould first. Once the edges are unstuck from the mould, carefully pull out the appliance following the path of the solidified IV channel (see video). TIP: applying baby powder with a brush (see video) will make this process easier and more likely to be successful without tears. | 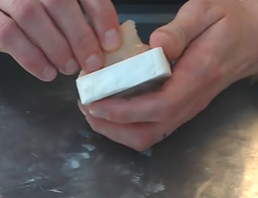 |
| Step 14: Create gap Create a small incision using scissor or scalpel where the gap in the IV tubing channel was initially. This will allow you to re-establish a complete tubing channel. | 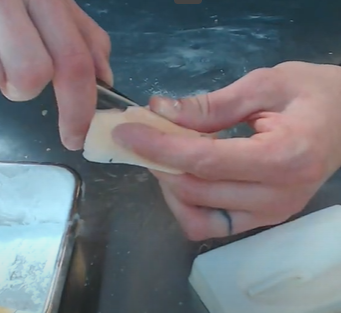 |
| Step 15: Prepare tubing & simulated blood Get the IV extension set with Luer lock on either end. Cut off the ‘male’ end of the tubing, as you will need the ‘female’ end to attach the syringe. Fill 20-60cc Luer-lock syringe with desired amount of water and red food colouring for simulated blood. Attach syringe to female end of IV extension tubing. TIP: Consider attaching multiple extension sets or long extension sets to be further away from bleeding wound to create distance between you and the task trainer/learner. | |
| Step 16: Prepare set-up Thread IV extension tubing through the wound module gap you had just created. TIP: You can use baby powder to reduce friction while inserting IV tubing. Push on syringe to release simulated blood. | 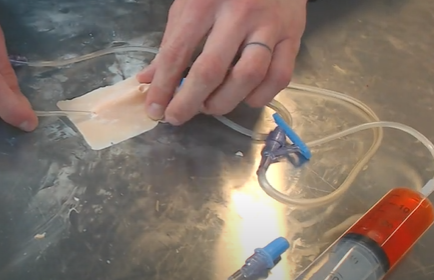 |

Simulated Undermining or Tunnelling Wound
Revised: January 2024
Time Commitment: 2 to 3 hours
Creator: Sébastien Perth
Content warning: gore
What you will need
For assembly
- Special Effects Grade Silicone (Dragon Skin™ FX pro Part A & B used for trainer below)
- Casting material (Smooth Cast 300™ Part A & B used for trainer below)
- Clay for walls and to texture skin surface
- Tools to shape clay (toothpicks, stir sticks, etc.) (wood tools work best)
- Disposable measuring cups (e.g. graduated medicine cups)
- Disposable larger cup (e.g. disposable drinking cup)
- Disposable stir sticks (e.g., coffee sticks, popsicle sticks, or tongue depressors)
- Silc pig™ flesh tone and red tone (optional pigment system compatible with Dragon Skin™)
- Silicone thickener (Thivex™ was used for trainer below)
- Flexible silicone castable foam (Soma Foama 15™ was used for this trainer)
- Medium to large stainless steel bowl
- Personal protective equipment: gloves and eye protection
- Knife or scalpel to clean up frayed/uneven edges
- Scissors
- Fake blood or water with red food colouring
- Wax paper to line your container or surface to make it easier to remove clay skin if using.
- Small paint brush
- Optional: rolling pin
- Optional: baby powder
- Optional: tooth brush
Instructions
| Assembly Instructions | Pictures |
|---|---|
| Step 1: Prepare the wound surface and tunnel 1A: Line your flat surface with wax paper. Examples of a suitable flat surface would be a kitchen counter, stainless steel surface, etc. Alternatively, use a large flat-bottomed container as your work surface with wax paper (e.g. cookie sheet). TIP: The Smooth Cast™ creates heat, so ensuring wax paper with a sturdy surface will potential minimize any damage to your work surface. 1B: On a flat surface, form the ‘positive’ (i.e. inverse) of the tunneling. 1C: Complete textured look on clay surface. Try to make the transition from clay to work surface smooth, so the end product appears more natural on skin or on a manikin. Keep in mind that the clay design will be what the finished silicone looks like. Take time to clean it up if needed. TIP: Dipping a finger in water and then rubbing it on the clay can give it a smoother texture. Just be careful not to use too much water. | 1B: 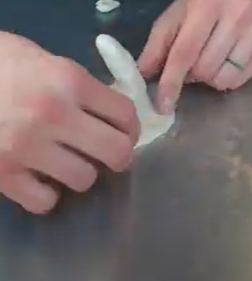 1C: |
| Step 2: Prepare the clay walls On a flat surface, roll clay into long strips about 1.5-2” wide, and ¼” thick. The length of your pieces will be dependent on the size of your wound Ideally using clay, make a wall around the wound, leaving at least 1cm between the wound and the wall. Make sure no gaps appear that could let the silicone to seep out. TIP: You can roll out the clay using the silicone bottles (securely sealed) or a rolling pin. |  |
| Step 3: Determine silicone amount If you decided to use a different size mould (i.e., not 3x5”) you need to determine how much silicone you need to fill your mould. 16 ml of silicone (8 ml each of parts A and B) will make 1in3 volume (16mL/in3). E.g., To make a 0.75” thick layer in a 3x5” mould, you will require 180 mL of silicone (90ml each of parts A and B). 3/4” x 3” x 5” = 11.25in3 11.25in3 x 16mL/in3 = 180 mL | 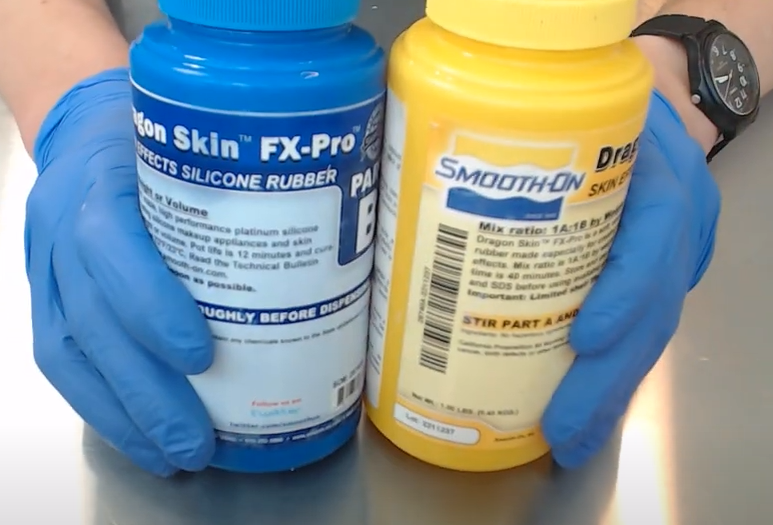 |
| Step 4: Prepare the silicone Step 4A : Open and stir Dragon Skin™ Part A into a small measuring cup. With a different stirring tool, do the same for Part B in a different small measuring cup. Step 4B : Once measured, Dragon Skin™ Part B can be placed into a disposable cup large enough to hold the final amount. Step 4C : Add pigment(s) as desired to Part B using a disposable toothpick or stir stick, and stir vigorously for 15 seconds/until completely combined without streaks. TIP: A little goes a long way. Start with a small amount of pigment; if you need more, add it, and stir again before adding Part A. Step 4D : Add Part A to Part B and mix vigorously for 15 seconds / until completely combined without streaks. IMPORTANT : Now that A & B are combined, you must pour it within 12 minutes, or it will begin to set. | 4A: 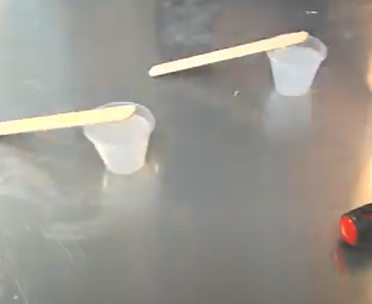 4C: |
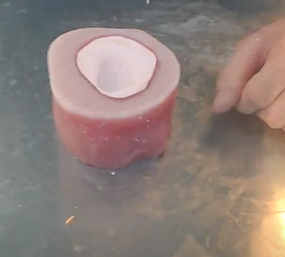
| Step 5: Pour the silicone Pour the prepared silicone with the skin tone pigment of your choice into the clay walls. If you notice leaks, plug them with additional clay or tape. Wait 40 mins (for a 3” x 5” wound) to cure. For other sizes, follow package instructions on wait time. Once cured, your silicone mold should look something like the photo to the right. NOTE: You could use this appliance as is, the steps below all for a more realistic feel to the appliance | 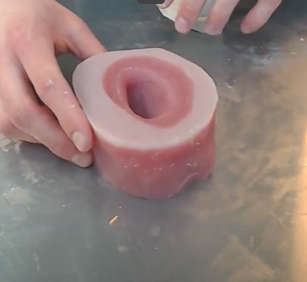 |
| Step 6: Determine Smooth Cast™ amount To make a 0.75” thick layer in a 3x5” mould, you will require 180 mL of Smooth Cast™ (90ml each of parts A and B). 3/4” x 3” x 5” = 11.25in3 11.25in3 x 16mL/in3 = 180 mL | |
| Step 7: Pour the Smooth Cast™ mould Step 7A: Open and stir Smooth Cast™ Part A in a small measuring cup. With a different stirring tool, do the same for equal parts Part B in a small measuring cup. You need enough to completely You need enough to completely cover the inside tunnel created by at least a few millimetres. Step 7B: Combine Parts A & B in a large cup and pour into silicone mould. Ensure you do not overpour. Wait 10-15 minutes to let the Smooth Cast™ cure. It will become warm to the touch and opaque. | 7A 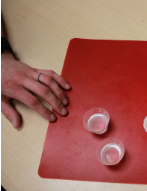 7B |
| Step 8: Add mould to bowl Pull out Smooth Cast mould and add to bowl. Secure the Smooth Cast mould with clay. | 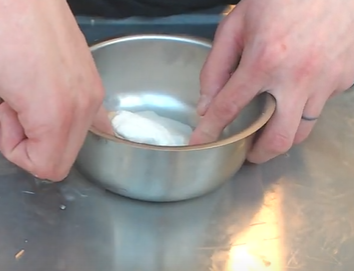 |
| Step 9: Determine silicone amount for under skin (wound bed) layer If you decided to use a different size mould (i.e., not 3x5”) you need to determine how much silicone you need to fill your mould. 16 ml of silicone (8 ml each of parts A and B) will make 1in3 volume (16mL/in3). E.g., To make a 0.75” thick layer in a 3x5” mould, you will require 180 mL of silicone (90ml each of parts A and B). 3/4” x 3” x 5” = 11.25in3 11.25in3 x 16mL/in3 = 180 mL | |
| Step 10: Prepare the inside wound layer of silicone Step 10A : Open and stir Dragon Skin™ Part A in a small measuring cup. With a different stirring tool, do the same for Part B in a small measuring cup. Step 10B : Once measured, Dragon Skin™ Part B can be poured into a disposable cup large enough to hold the final amount. Step 10C : Add red-brown tone pigment(s) to Part B using a disposable toothpick or stir stick, and stir vigorously for 15 seconds/until completely combined without streaks. TIP: A little goes a long way. Start with a small amount of pigment; if you need more, add it, and stir again before adding Part A. Step 10D : Add Part A to Part B and mix vigorously for 15 seconds / until completely combined without streaks. IMPORTANT : Now that A & B are combined, you must pour it within 12 minutes, or it will begin to set. | 10B: 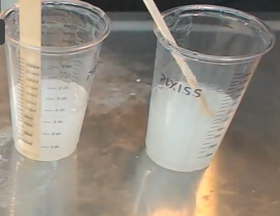 10C: 10D: |
| Step 11: Add Thivex™ Start by adding a few drops of Thivex™ or other silicone thickener. Aim for a thickness that will hold to the side of the cup for several seconds. The goal is that it does not run down the Smooth Cast™ mould when poured. Add more drops as needed and mix thoroughly. |  |
| Step 12: Apply thickened silicone to Smooth Cast™ mould Apply silicone to the Smooth Cast™ mould with tongue depressor or stir stick. Make sure any part that would be ‘under skin’ is covered by the thickened silicone. | 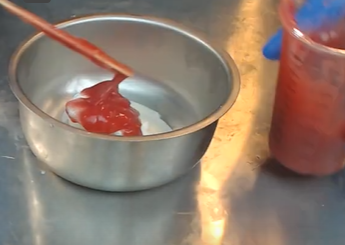 |
| Step 13: Determine silicone amount for skin layer If you decided to use a different size mould (i.e., not 3x5”) you need to determine how much silicone you need to fill your mould. 16 ml of silicone (8 ml each of parts A and B) will make 1in3 volume (16mL/in3). E.g., To make a 0.75” thick layer in a 3x5” mould, you will require 180 mL of silicone (90ml each of parts A and B). 3/4” x 3” x 5” = 11.25in3 11.25in3 x 16mL/in3 = 180 mL | |
| Step 14: Prepare the skin layer of silicone Step 14A : Open and stir Dragon Skin™ Part A into a small measuring cup. With a different stirring tool, do the same for Part B in a different small measuring cup. Step 14B : Once measured, Dragon Skin™ Part B can be poured into a disposable cup large enough to hold the final amount. Step 14C : Add flesh tone pigment(s) to Part B using a disposable toothpick or stir stick, and stir vigorously for 15 seconds/until completely combined without streaks. TIP: A little goes a long way. Start with a small amount of pigment; if you need more, add it, and stir again before adding Part A. Step 14D : Add Part A to Part B and mix vigorously for 15 seconds / until completely combined without streaks. IMPORTANT : Now that A & B are combined, you must pour it within 12 minutes, or it will begin to set. | 14B: 14C: 14D: |
| Step 15: Pour half of the silicone Pour the prepared silicone with the skin tone pigment of your choice into the bottom of the mould, about half-way. | 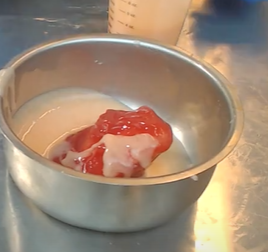 |
| Step 16: Add Thivex™ to remaining silicone and pour in mould Add a few drops of Thivex™ to the remaining Dragon Skin™ silicone in your cup, and pour the rest into the bowl. | |
| Step 17: Mix and brush the thickened silicone onto the mould and bowl Mix the now thickened silicone in the bowl with the Smooth Cast™ mould. Brush the thickened Thivex™ up the walls of the bowl using a paint brush. Ensure there is silicone covering every part of the bowl. | 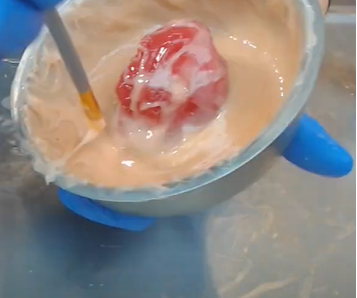 |
| Step 18: Measure Soma Foama™ Add 2 parts ‘Part A’ of Soma Foama™ to a large disposable cup with stir stick. Add 1 part ‘Part B’ of Soma Foama™ to different large disposable cup with stir stick. Calculation instructions available on bottle. | 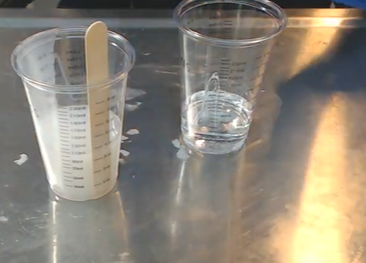 |
| Step 19: Mix and Pour Soma Foama™ Mix together parts A & B of Soma Foama 15™ and add to bowl. The Soma Foama 15™ will expand to cover wound. NOTE: if the expanded Soma Foama 15™ does not fully cover tunnel, you can mix another batch and add on top, the Soma Foama 15™ combines well together. | 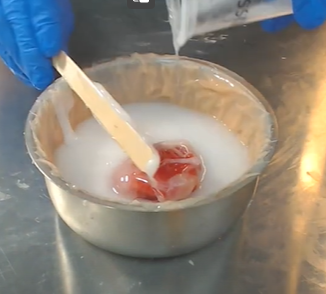 |
| Step 20: Cut away excess foam Wait for foam to cure. Will be solid and more opaque. Once foam is cured, cut away the excess foam to create a flat surface using scizzors. | 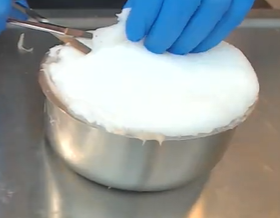 |
| Step 21: Remove from bowl and remove mould Pull out the silicone/foam mould from the bowl, and remove the inner Smooth Cast™ mould inside. Remove any remaining excess foam, being careful not to cut at the silicone. | 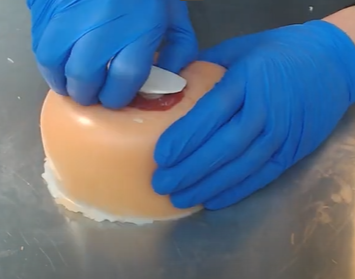 |
| Step 22: Create bottom silicone layer Mix a small amount (~15mL) of Dragon Skin™ silicone again, using same guiding instructions as above, mixing Part B with flesh tone pigment. Pour mixed Dragon Skin™ silicone on flat surface with taped down wax paper (or stainless steel work surface) and spread out to cover bottom of appliance created. |  |
| Step 23: Enclose wound task trainer Carefully place appliance on top of silicone. Using a tool spread silicone from the work surface to the sides of the appliance. This will enclose the appliance. Wait 10-20min to cure and then trim away the excess silicone. Your wound task trainer is now complete. | 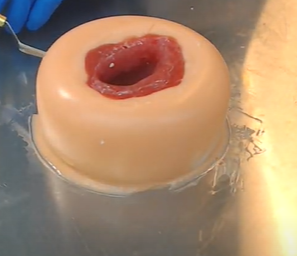 |