Suture and Staple Care Introduction Module
Introduction
Welcome to the suturing and stapling module! Here you will learn how to create your own completely customizable suturing and stapling pads, including ones with variable complexity and depths, and ones that can be attached to a manikin or standardized patient. In the section there will be:
- A clear list of materials needed to build the task trainer,
- Step-by-step instructions on creation of the task trainer,
- Pictures demonstrating key steps for creation and use,
- A video with audio descriptions of creating the task trainer, and
- A cost breakdown for the task trainer, including material sourcing information.
Once you have created your task trainer:
- The ‘Skills Station Set-up Guide’ will identify what supplies you should lay out and how you should set-up your task trainer to promote learner success.
- The ‘Teaching / Feedback’ section will provide key frameworks for how to teach this skill and provide constructive feedback to participants based on their level of competency.
- The ‘Evaluation and Resources’ section will list and link to find peer-reviewed and evidence-based checklists to evaluate on the skill of suture and staple care.
Skill Station Set-up Guide
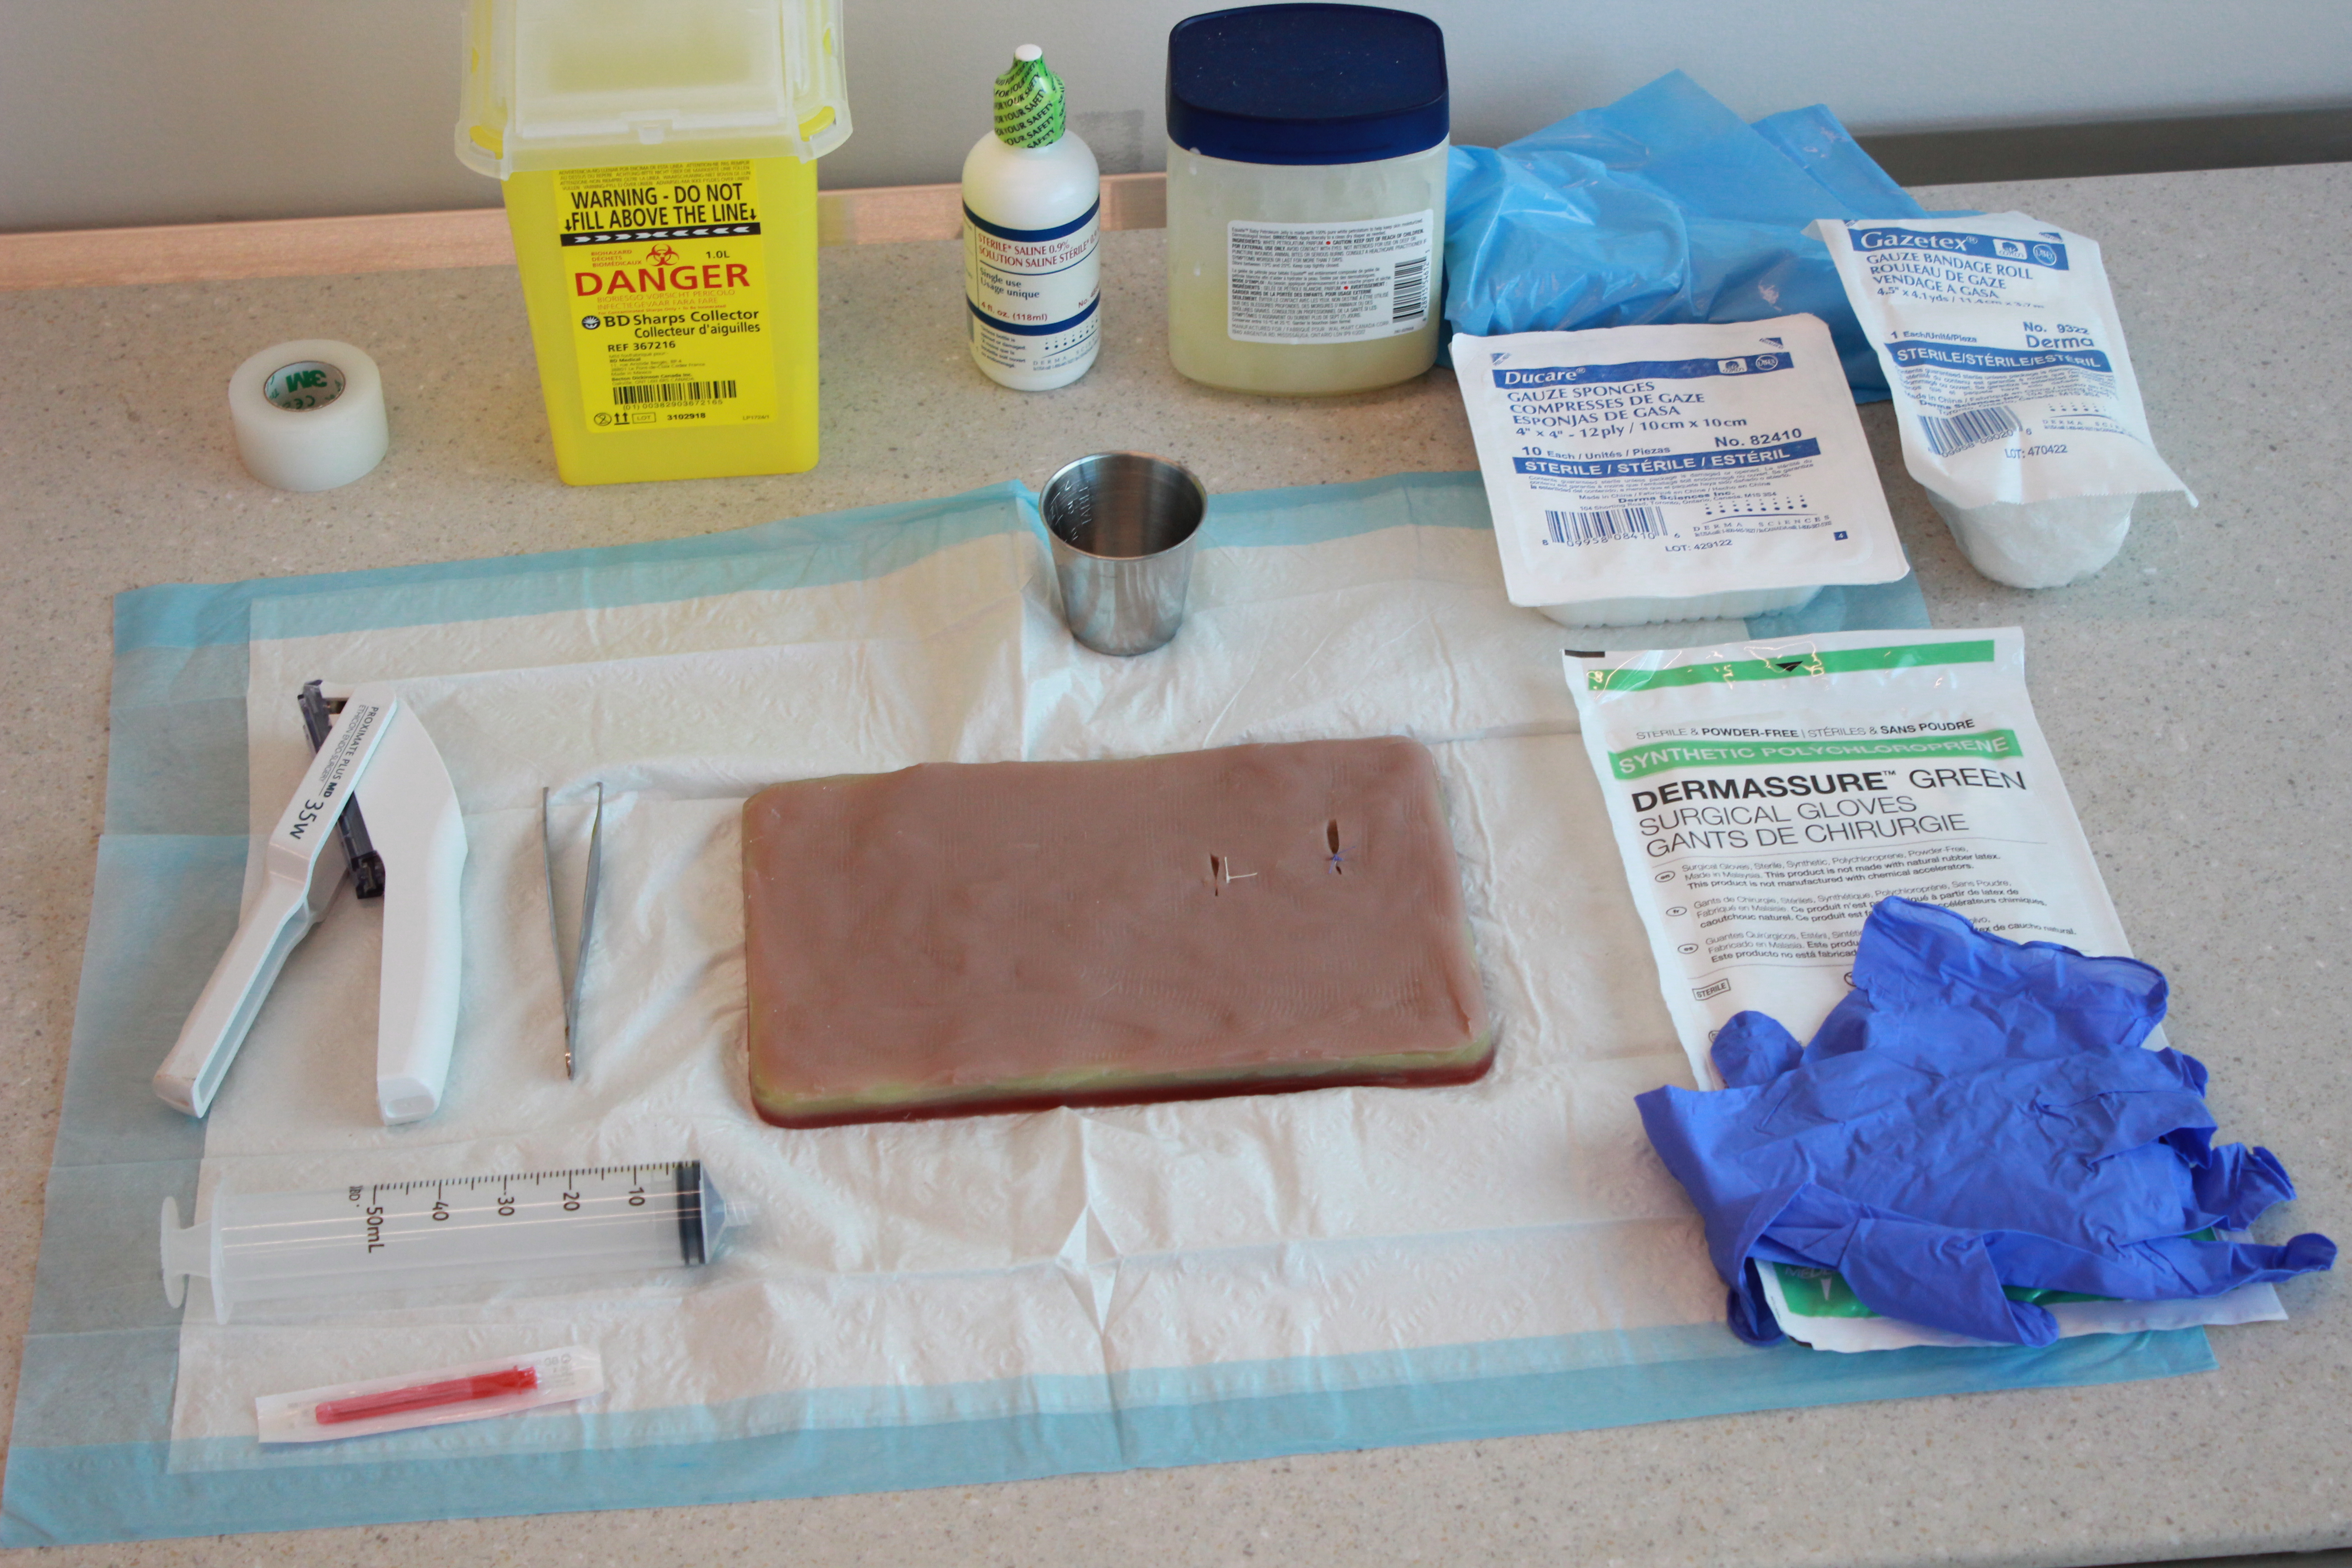
| Suture Set-up Supplies | |
|---|---|
|  |
| Staple Set-up Supplies | |
|---|---|
|  |
Teaching / Feedback
Pendleton (1984) Method for Feedback (Burgess et al., 2020)
| 1. Ask the learner what went well |
| 2. Tell the learner what went well |
| 3. Ask the learner what could be improved |
| 4. Tell the learner what could be improved |
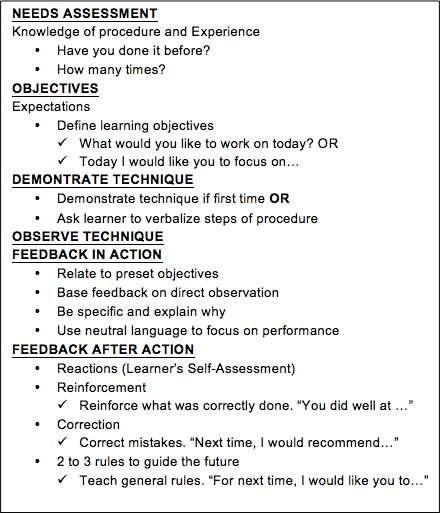
N.O.D.O.F.F tool for Technical Skills Retention (Ibrahim, 2017)
- Needs Assessment
- Objectives
- Demonstrate
- Observe
- Feedback in Action
- Feedback after Action
Evaluation – Best Practice Resources
(Disclaimer: does not override institutional or regulatory guidelines about scope of practice, proper steps, or equipment used).
- Streitz, M. (2023). How to Repair a Laceration with Stapling. Merck Manuals. https://www.merckmanuals.com/en-ca/professional/injuries-poisoning/how-to-care-for-wounds-and-lacerations/how-to-repair-a-laceration-with-stapling __
- Streitz, M. (2023). How to Repair a Laceration with Simple Interrupted Sutures. Merck Manuals. https://www.merckmanuals.com/en-ca/professional/injuries-poisoning/how-to-care-for-wounds-and-lacerations/how-to-repair-a-laceration-with-simple-interrupted-sutures#v52124688 __
- Lipsett, S. (2025). Closure of Minor Skin Wounds with Staples. UptoDate. https://www.uptodate.com/contents/closure-of-minor-skin-wounds-with-staples __
- deLemos, D. & Singer, A.J. (2025). Skin Laceration Repair with Suture. UptoDate. https://www.uptodate.com/contents/skin-laceration-repair-with-sutures?topicRef=6320&source=see_link __
- NSWOC wound care guide. https://www.nswoc.ca/_files/ugd/9d080f_977c08bf54a740ad997e25a07e615b5a.pdf
References
Burgess, A., van Diggele, C., Roberts, C., & Mellis, C. (2020). Tips for teaching procedural skills. BMC Medical Education, 20, 1-6.
Ibrahim, M. (2017). The use of a novel teaching rubic improves technical skill acquisition and retention. McGill University. https://escholarship.mcgill.ca/downloads/c534fr44f.