Intravenous (IV) and Ultrasound Guided IV Insertion Task Trainer Instructions
Revised: November 2023
Time Commitment: 60 to 90 minutes
Creators: Sébastien Perth & Meagan Vanderploeg Reviewers: Jacob Vanderploeg & Shavone Wesley
Content warning: needles, simulated blood
Disclaimer: these instructions will reference the silicone product Dragon Skin™ and the pigment product Silc Pig™. This is not an endorsement or sponsorship of either of these products. Individuals are invited to use alternative like-products for their prototypes. Instructions below are specific to the commercial products described. Individuals who use like-products as substitutes should follow the package instructions.
What you will need
- Special effects grade silicone (Dragon Skin™ FX pro Part A & B used for trainer below)
- Clay
- Disposable measuring cups (e.g. graduated medicine cups and clear disposable cups)
- Stir sticks (e.g., coffee sticks, popsicle sticks, or tongue depressors)
- Silc pig™ flesh tone (optional pigment system compatible with Dragon Skin™)
- Penrose drain or oxygen extension tubing or foley catheters (to create tunnel for vessel) (penrose drain used in video)
- Scissors
- Ruler or tape measurer
- Personal protective equipment: gloves and eye protection
- Red food colouring
- Water or saline
- Forceps or stylet
- Wax paper
- Optional: Painter’s tape
Important: note regarding choice of simulated vessel material
The choice of vessel tubing (oxygen tubing, penrose drain, foley, etc.) will change the general elasticity and rigidity of the ‘vessel’. Feel free to trial different types of tubing to achieve the type of vessel feedback you seek in your task trainer.
Assembly Instructions
| Assembly Instructions | Pictures |
|---|---|
| Step 1: Prepare the clay walls Line your flat surface with wax paper. Examples of a suitable flat surface would be a kitchen counter, stainless steel surface, etc. Alternatively, use a large flat-bottomed container as your work surface with wax paper (e.g. cookie sheet). TIP: The Smooth Cast™ creates heat, so ensuring wax paper with a sturdy surface will potential minimize any damage to your work surface. On a flat surface, roll clay into long strips about 1.5-2” wide, and ¼” thick. You will need two 3” pieces and two 5” pieces. |  |
| Step 2: Create holes for the vessel tunnel If relevant cut the adaptor end off a piece of oxygen extension tubing (or other selected equipment for ‘veins’). Use the tubing to mark and cut a hole in the center of the 3” pieces of clay (aim for the bottom of the hole to be 1cm off the work surface). | 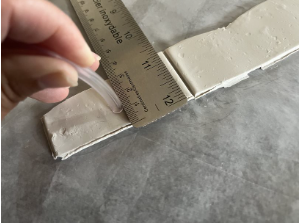 |
| Step 3: Assemble clay walls and mould structure Stretch the tubing to encourage it not to curl as much. TIP: Make ~1cm pieces of clay and secure the tubing down to help straighten the ‘vessels’ out as you build the walls. Thread the 3” clay walls onto the tubing, spacing them about 5” apart. Connect the walls by pinching the 3” and 5” pieces together to create a seam, and also press the clay onto the work surface so there are no leaks. TIP: You can run a piece of masking or painters tape along the clay and the work surface to prevent leaks. | 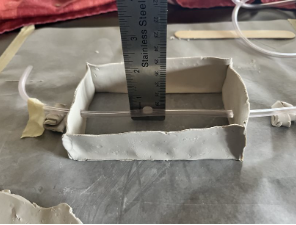 |
| Step 4: Determine silicone amounts If you decided to use a different size mould (i.e., not 3x5”) you need to determine how much silicone you need to fill your mould. Aim for ¼” above your tubing TIP: 16 ml of silicone (8 ml each of parts A and B) will make 1in3 volume (16mL/in3). E.g., To make a 0.75” thick layer of silicone in a 3x5” mould, you will require 180 mL of silicone (90ml each of parts A and B). 3/4” x 3” x 5” = 11.25in3. 11.25in3 x 16mL/in3 = 180 mL | 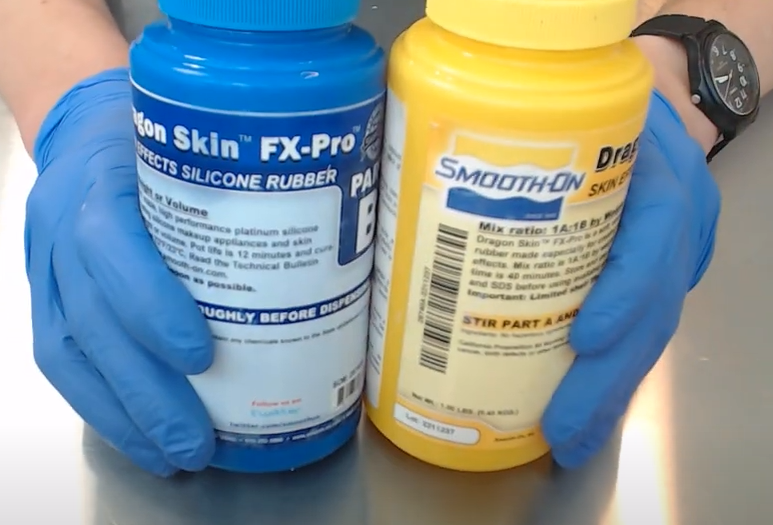 |
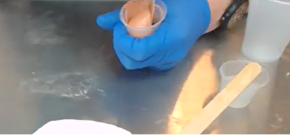
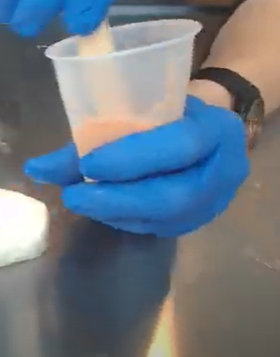
| Step 5: Prepare the silicone Step 5A : Open and stir Dragon Skin™ Part A. With a different stirring tool, do the same for Part B. Step 5B : Using a disposable measuring cup (e.g. graduated measuring cups), measure Dragon Skin™ Part B into a disposable cup large enough to hold the final amount (e.g., for 3x5” mould, 180ml). Step 5C : If using pigment, add flesh tone pigment(s) to Part B using a disposable toothpick or stir stick, and stir vigorously for 15 seconds/until completely combined without streaks. TIP: A little goes a long way. Start with a small amount of pigment; if you need more, add it, and stir again before adding Part A. Step 5D : Add Part A to Part B and mix vigorously for 15 seconds / until completely combined without streaks. IMPORTANT : Now that A & B are combined, you must pour it within 12 minutes, or it will begin to set. | 5A: 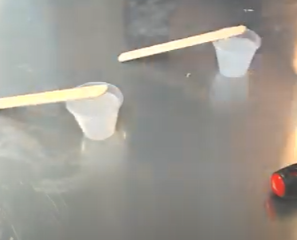 5C: 5D: |
| Step 6: Pour the silicone Pour the prepared silicone with the flesh tone pigment of your choice into the mould. The oxygen tubing should be covered by at least a couple millimeters of silicone. If you notice leaks, plug them with additional clay or tape. Wait 40 mins for this layer to cure. | 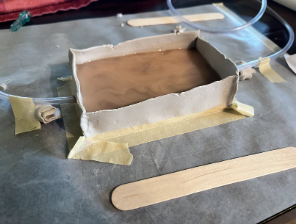 |
| Step 7: Remove the clay walls Removing the IV task trainer from the mould/cast. Peel the clay off the task trainer. Touch up any frayed edges with scissors if desired. | 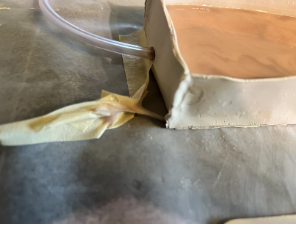 |
| Step 8: Prepare the vessels Carefully remove the tubing from the task trainer. Use something long and skinny to thread the tubing/simulated vessel through the tunnel (e.g. Kelly forceps, bougie, stylet, etc.). Fill the tubing/simulated vessel with water or saline (optional: dye it red to simulate blood with food colouring). Tie or clamp both ends. | 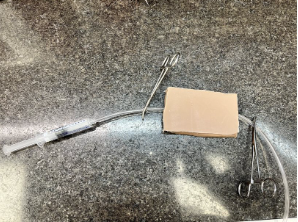 |
Attaching to a manikin or standardized patient
Place the insertion module on a SAM® splint or equivalent splint. For extra security, glue down the module to the splint. Note: check the quality of the splint prior to placing the module on top to ensure sharps do not penetrate the structure.
Secure the module to the arm/limb using either:
Important: circulation of standardized patient should be assessed if tourniquet is on for long periods.